Like many people you may have grown vegetables such as lettuce and silverbeet (chard) from seed but never given a thought to doing so for your tomato crop. Because of this you can grow only the limited range of varieties that are sold as seedlings by plant nurseries. You miss a great opportunity to try some of the vast range of varieties available as seed. Many of these are tasty heirloom tomatoes, which you can select when you decide to grow tomato plants from seed.
A packet of seed costs about the same as a punnet of seedlings. Tomato seeds that are stored in a cool, dark place will still be viable for up to four years after purchase. You could try growing extras and sell the young plants or donate them to a school fair. Or you could swap some with a friend of neighbour and have an extra variety to grow, free of charge. I’m sure you could think of other money-saving ideas.
It is easy to grow tomato plants from seed.
I find it an interesting experience each year to sow the seeds I have chosen and watch them emerge as tiny seedlings, which I nurture indoors until they are nearly ready to transplant outside. The seeds can be germinated outdoors if you live in a frost-free area but otherwise the seedlings are too tender and must be grown indoors until after the frosts cease.
When to plant
You can plant seeds indoors around six weeks before the last frost is expected. I like to do so eight weeks or more before that time and keep them indoors for a longer time. This enables me to replace any that the cat knocks down or that encounter some other disaster. There is also another advantage: the young plants are bigger and have stronger root systems.
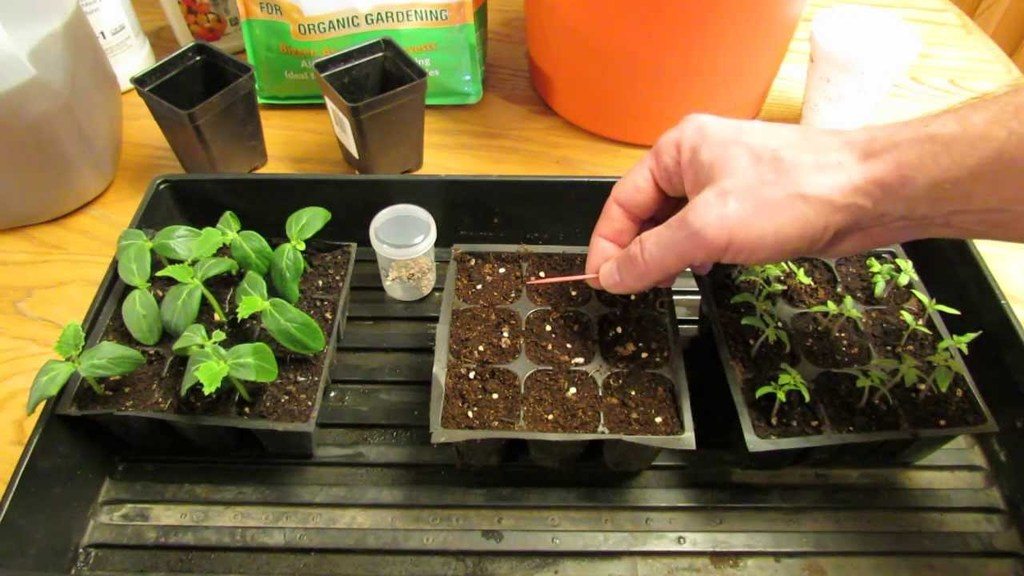
Sowing the seeds
Choose a good quality commercial seed-raising mix or make your own. One recommendation is to use 1/3 each of peat, compost and coarse vermiculite. This mix will hold water without getting soggy and will let sufficient air in.
There is no need to buy special containers unless you wish to. You can use discarded yoghurt pots or anything similar. The important point to remember is to make drainage holes in the bottom.
Fill each pot with your chosen potting mix, press it down gently, water lightly if necessary, and place your seeds 1 cm apart (0.5 inches). Press them gently and cover them with 5 mm (0.2 inches) of the potting mix. I also cover them with a piece of bubble wrap cut to size to retain moisture. Don’t forget to label them. Place your pots in a warm place.
Caring for the seedlings
Check the pots every few days for germination and moisture content. The seeds should germinate over 5 – 10 days. Once you see several seedlings place the pots in a bright place but out of direct sunlight. Check them daily for adequate moisture.
Once the little plants have their first true leaves, feed them weekly with an organic liquid fertilizer such as blood and bone, seaweed or some propriety mixture. Dilute this to half the recommended strength.
Repotting
By the time the seedlings are 2.5 cm (2 inches) tall they will have outgrown their containers. They should be repotted individually into pots that are 7 cm – 10 cm (3 in to 4 in) in diameter and filled with a good potting mix, planting them deeper in the soil. Water them in carefully.
The hardening process
Once the days lengthen and start to warm up in early spring you can place the pots outside in a sheltered place, taking them inside again late in the afternoon when the air start to cool. Gradually they can be exposed to cooler temperatures. You will notice a purple colouring on the stems near the roots as they harden.
Finally
During the week before planting you should be able to leave the plants outside during the night as well. Make sure the pots don’t dry out. You should then have hardy, homegrown seedlings ready to fill your prepared tomato plot(s).